Email basket Plugin
This plugin allows your customers to email items in the cart to the store owner and to themselves.
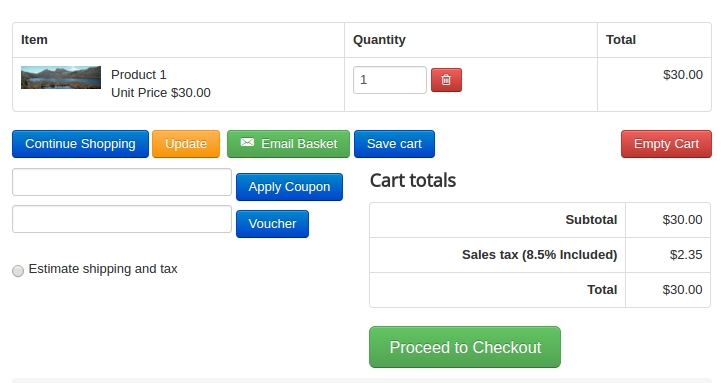
The plugin nicely integrates in the default cart page of J2Store. You can ask the customers to provide their name, address or any other information while emailing the cart.
Requirements
PHP 5.2 or higher
Joomla 2.5.x
J2Store 2.8.0 or above
Installation Instructions
Use the Joomla installer to install the plugin.
In the backend, go to J2Store->Apps and enable the Email basketplugin.
Open the plugin.
Enter the parameters (read the explanation about each parameter given below)
Save and close it.
Now you can see the Email Basket button in the cart page.
Parameters
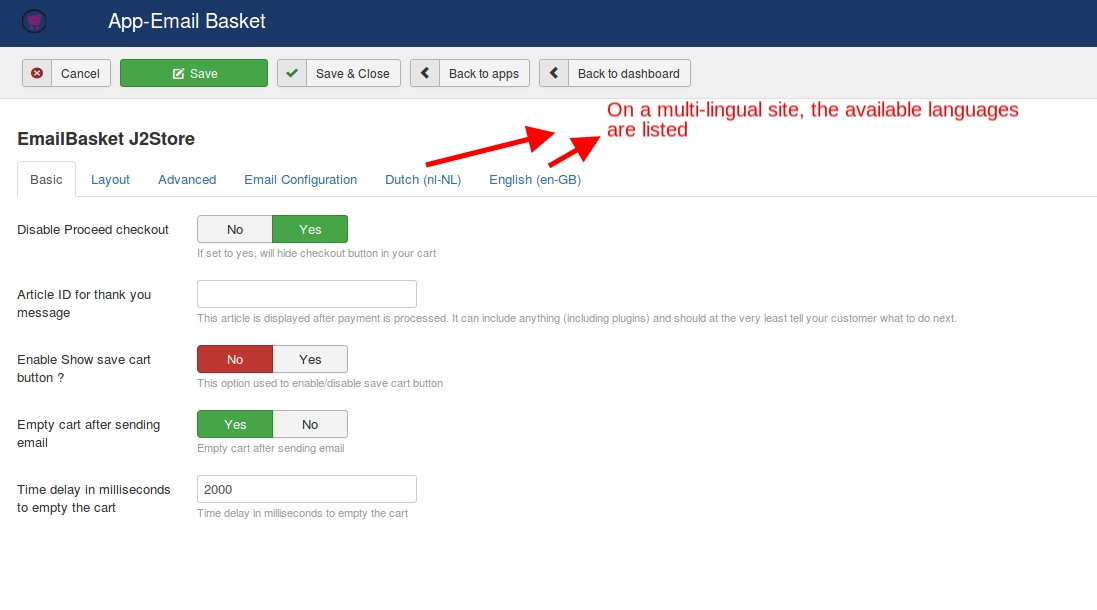
Basic settings
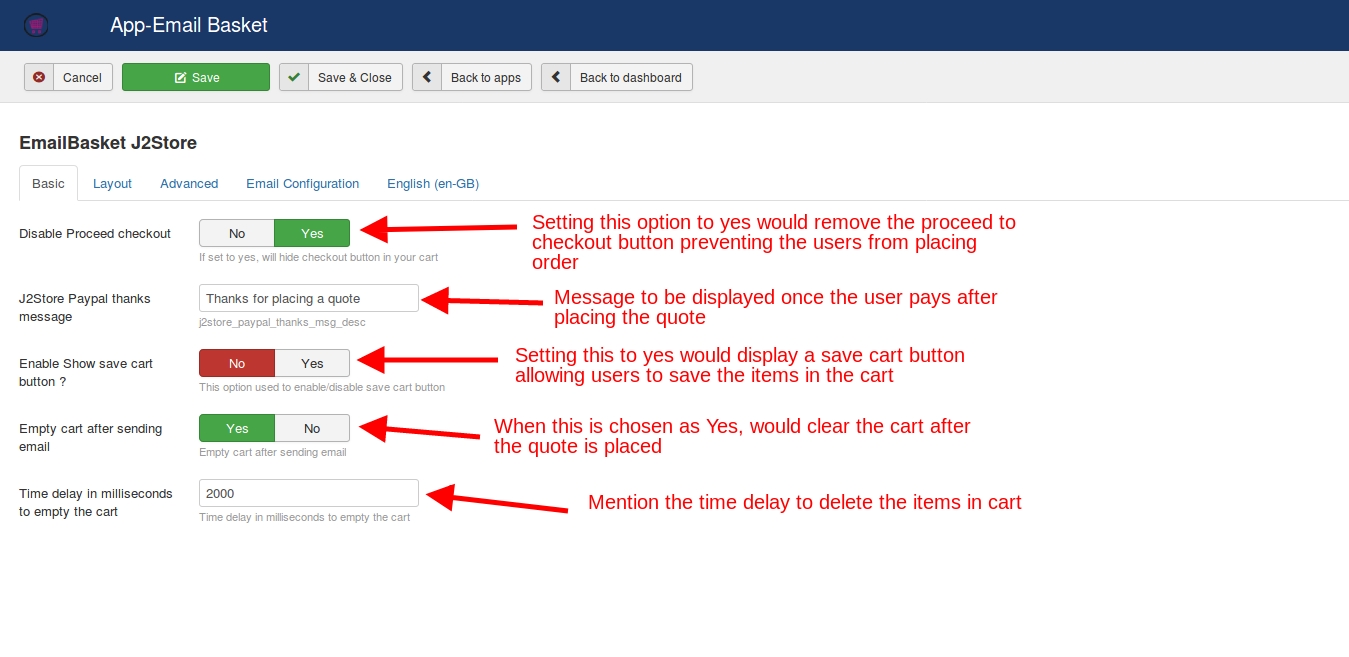
**Disable proceed checkout **
If you set this to YES, the plugin will hide the checkout button in the cart.
Article ID for thank you message
The Article given will be displayed after the payment is processed and it can include a Thank you message or any kind of text.
**Enable show save cart button
Set **YES will display the Save cart button(which is used for un-registerd users) in cart page. Clicking on this button will redirect the customer to register. After registering and loggin in, the cart items remains in the basket.
Empty cart after sending email
If you set this to YES, the plugin will empty the cart after emailing the cart items to store owner.
Time delay in milliseconds to empty the cart
You can set a delay for emptying the cart. Default is 2 seconds.
Layout
If you would like to add / remove the fields in Email form without affecting checkout form fields, it is possible in this section.
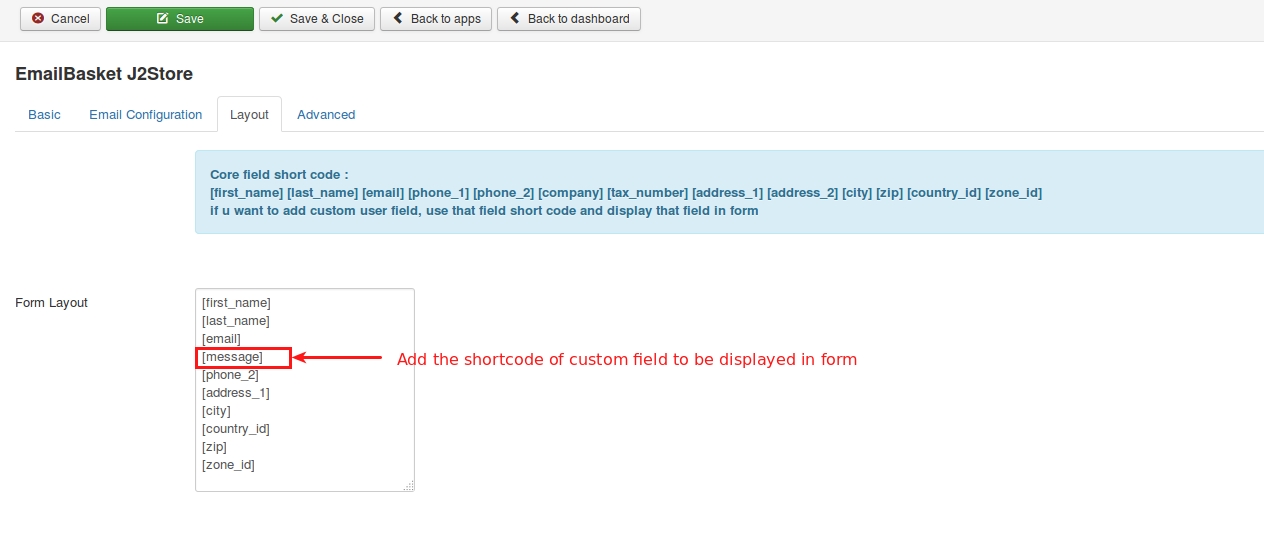
In this section, you can create the custom form by adding field shortcode given in the top of the layout tab page and display that field in the form.
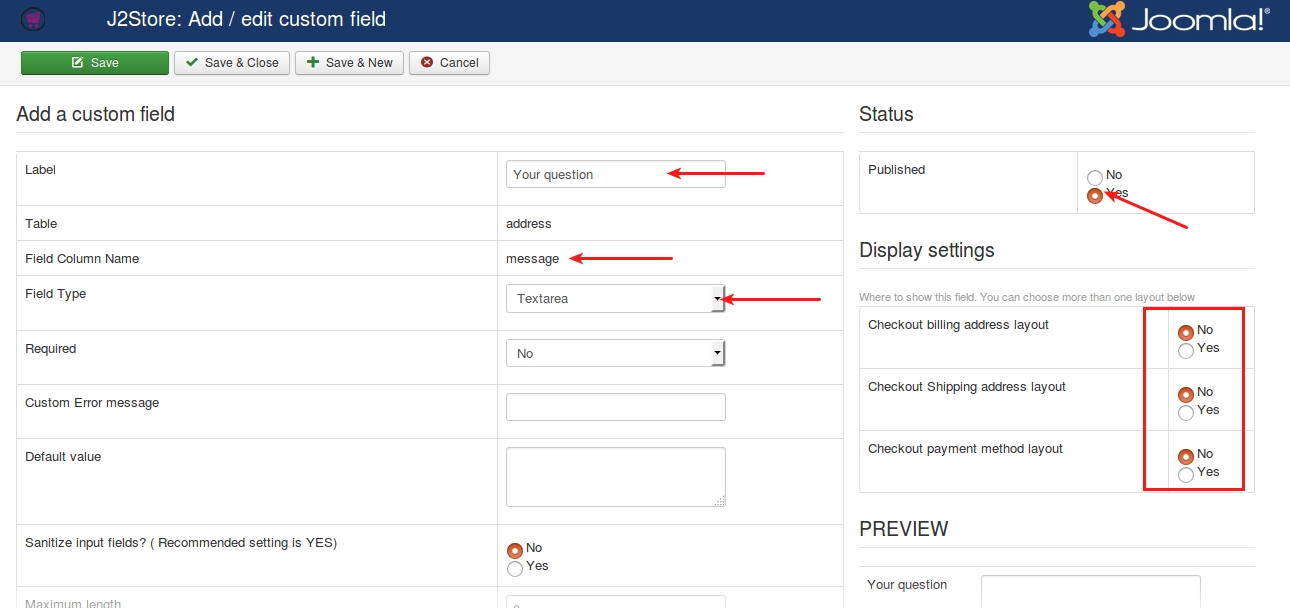
To add any new fields, go to J2Store > Setup > Custom fields. Click NEW to create new field.
Enter the label name, field name, choose field type and set the status to Published.
If you don’t want to display this new field in checkout and wants to display it only in Email form, then in custom field display settings, set NO to all layouts (Checkout billing address layout, Checkout shipping address layout, Checkout payment method layout).
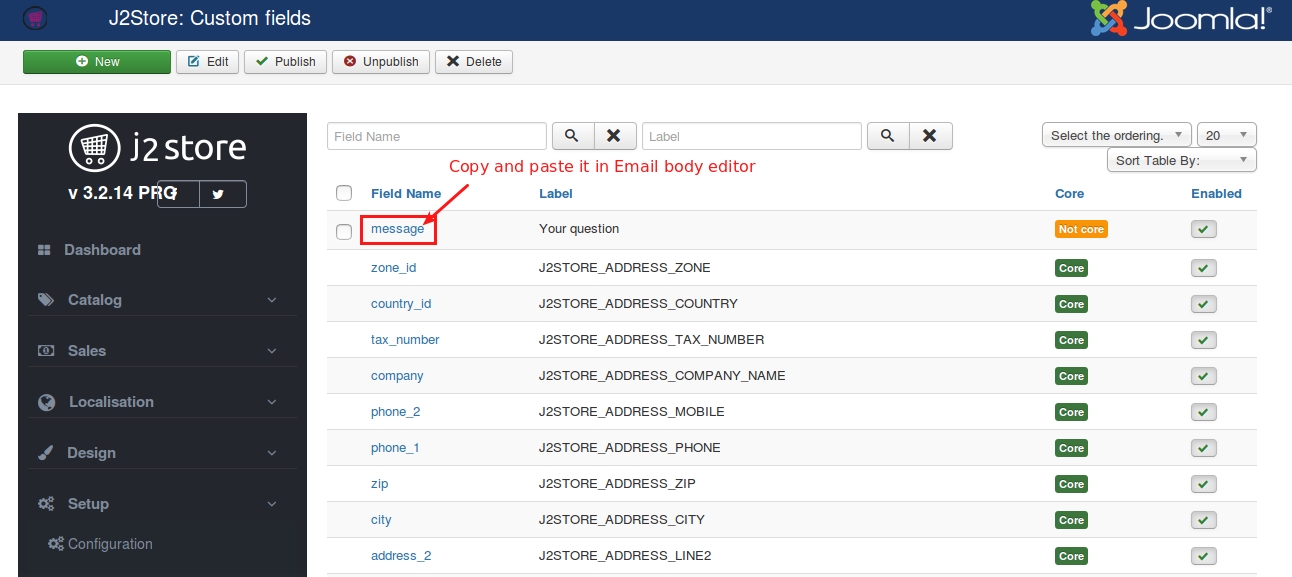
Now, in form layout add the shortcodes of fields you want to display in email form. To add custom field shortcode, copy the field name in J2Store > Setup > Custom fields section and paste it in the form. The field name should be enclosed with square braces. For example, [message].
Choose Basket modal type :
Select whether you want a bootstrap model or custom model.
Advanced
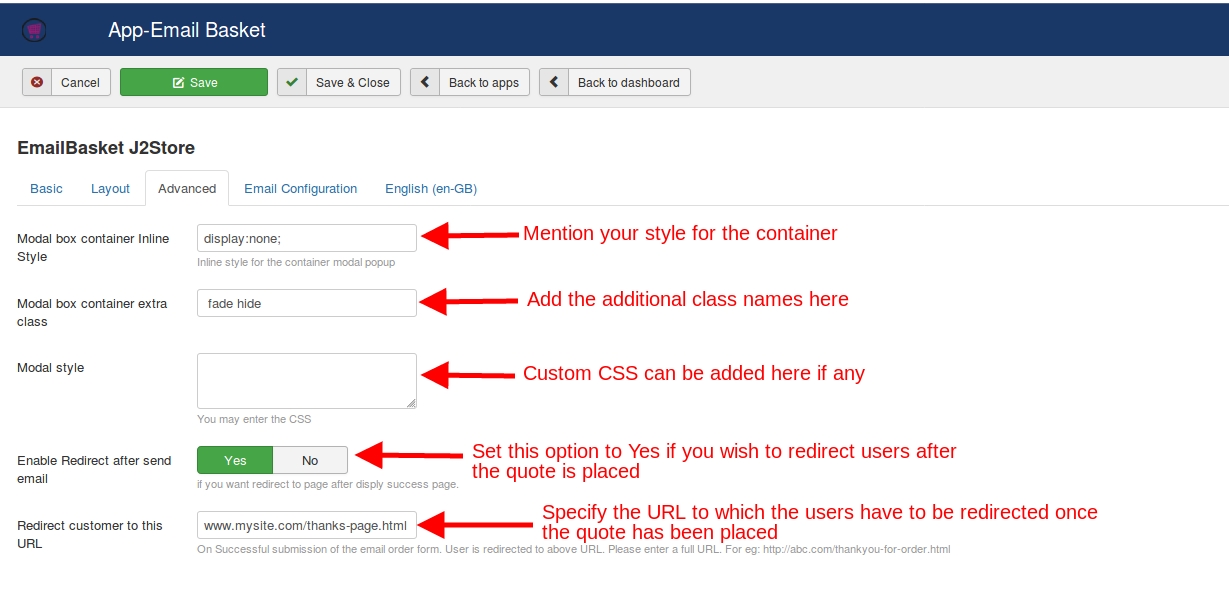
Display box container Inline Style
You can add the additional inline style to the box container in the given text box.
Modal box container extra class
You can add the additional class names to the modal box container in the given text box.
Modal style
You can add the custom css in the given text area.
Enable Redirect after send emailSet this option to Yes if you wish to redirect the users to a page after the order has been placed.
Redirect customer to this URL
Enter the URL to which the customer should be redirected on the form submission.
Email Configuration
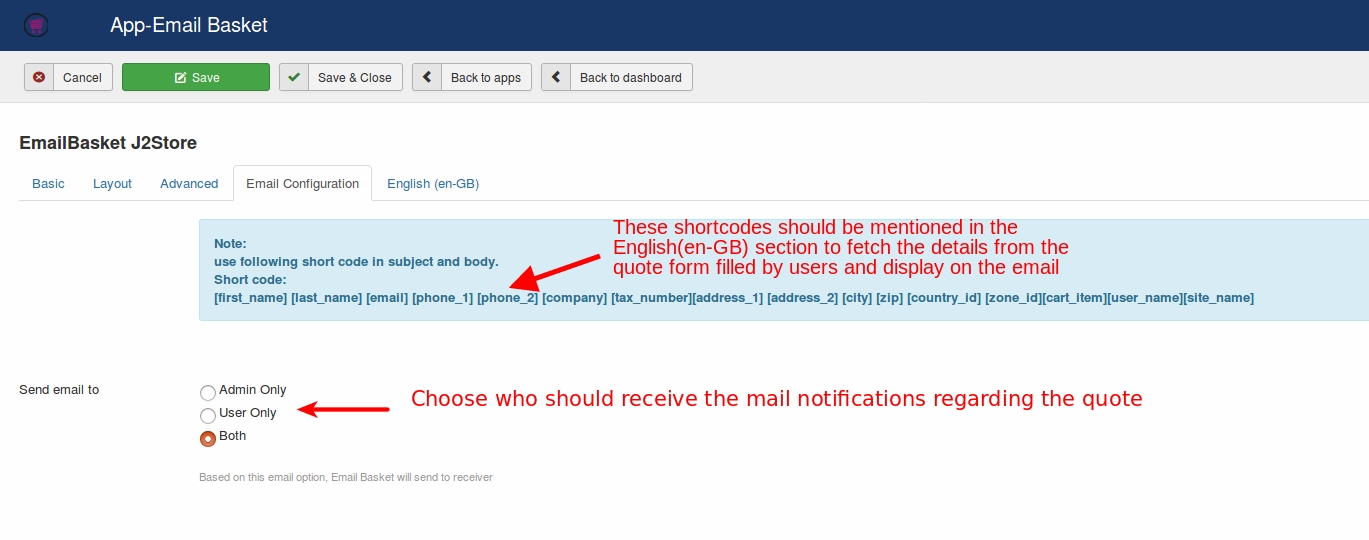
Send email to
Choose the user to whom you wish to send the email.
English(En-GB)
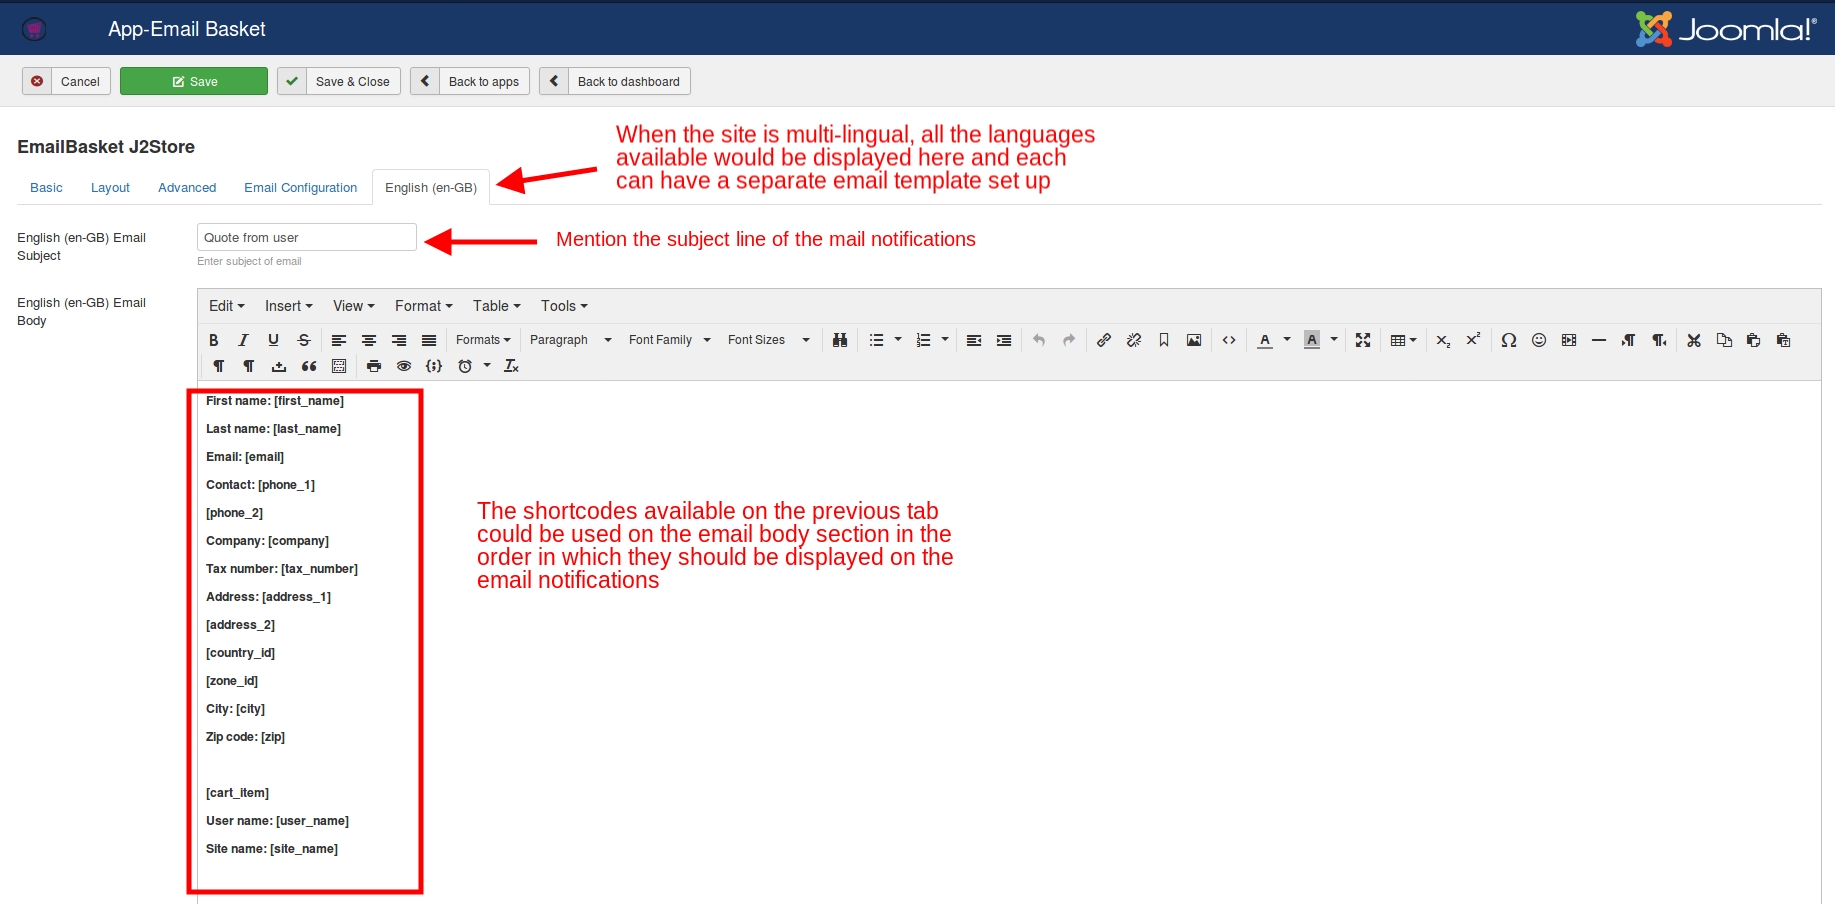
In this section, the email template could be set up. The shortcodes found in the previous tab could be used here. The order in which they are specified here would determine their order in the email notifications.
If the site is multi-lingual, the languages available would be displayed here and the email templates could be set up for each one of them accordingly.
On a multi-lingual site:
Email Subject
Enter the subject of the email here.
Email Body
In the Email body section, you can use the shortcodes to display the dynamic information such as customer’s name, email, country, cart items, etc..[first_name][last\_name][email][phone\_1][phone_2][company][tax_number][address\_1][address_2][city][zip][country\_id][zone_id][cart\_item][user_name][site\_name]
To display the custom field information (enterd by the user when filling form) in an email the customer and admin receive, it is possible by adding the shortcode of respective custom field in the Email body editor. For example, if you are having text area as a custom field in your email form, then copy the field name(you can get it in custom field section J2Store > Setup > Custom fields) and paste it in Email body editor. The custom field shortcode should be enclosed with square braces. For example, [message]. Refer the image below:
Video Tutorial
Last updated
Was this helpful?
