
Email templates
You can customize the email notifications sent to the customers when they place an order. The email templates offer a wide range of short codes to include dynamic data like order information, customer information in the email notification.
Customizing the template
Free version
Write a language override for the following constants:
J2STORE_ORDER_EMAIL_TEMPLATE_STANDARD_SUBJECT
This is the subject of the email
J2STORE_ORDER_EMAIL_TEMPLATE_STANDARD_BODY
This controls the body of the email.
Refer below all the short codes that can be used in the email template
PRO version
In Pro version, you have the ability to create the email template from the backend. And you also have the ability to apply different restrictions for them.
To create an email template, follow the steps as shown with the help of images.
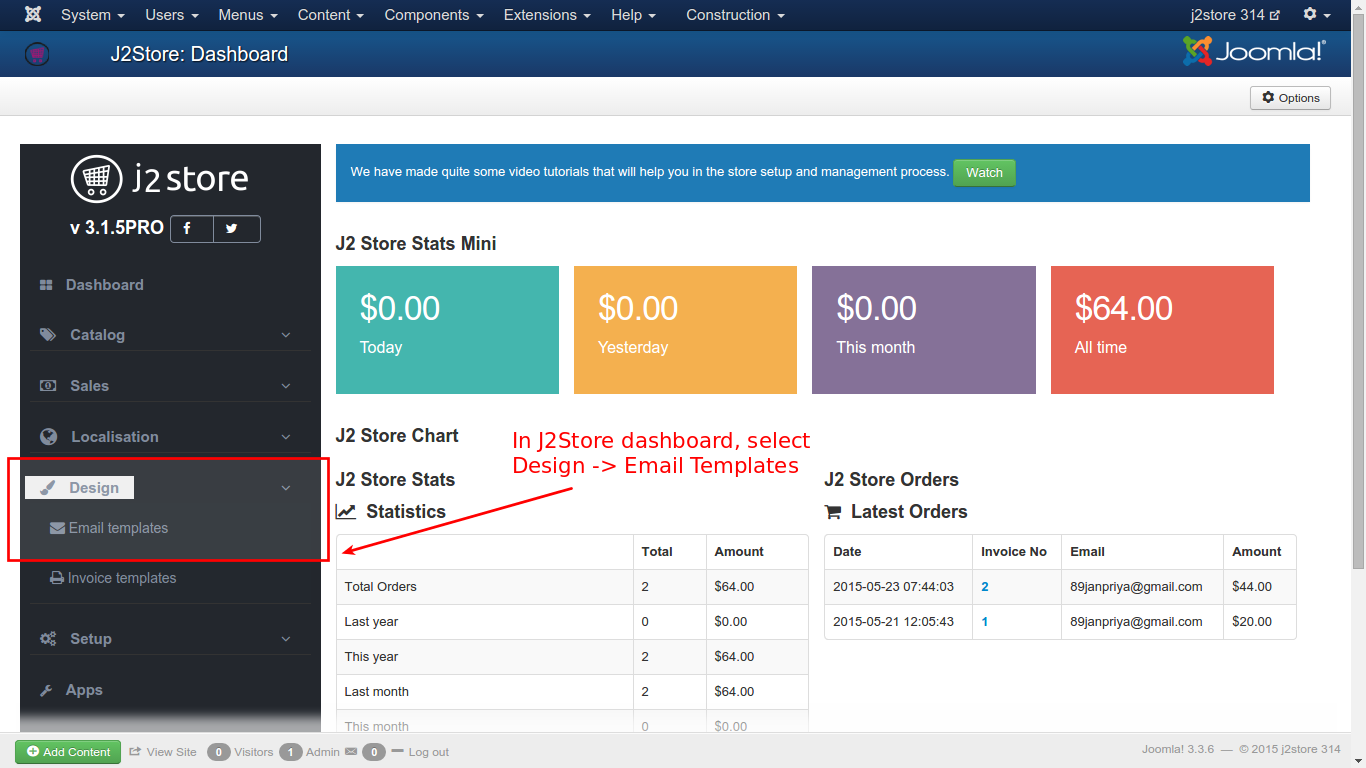
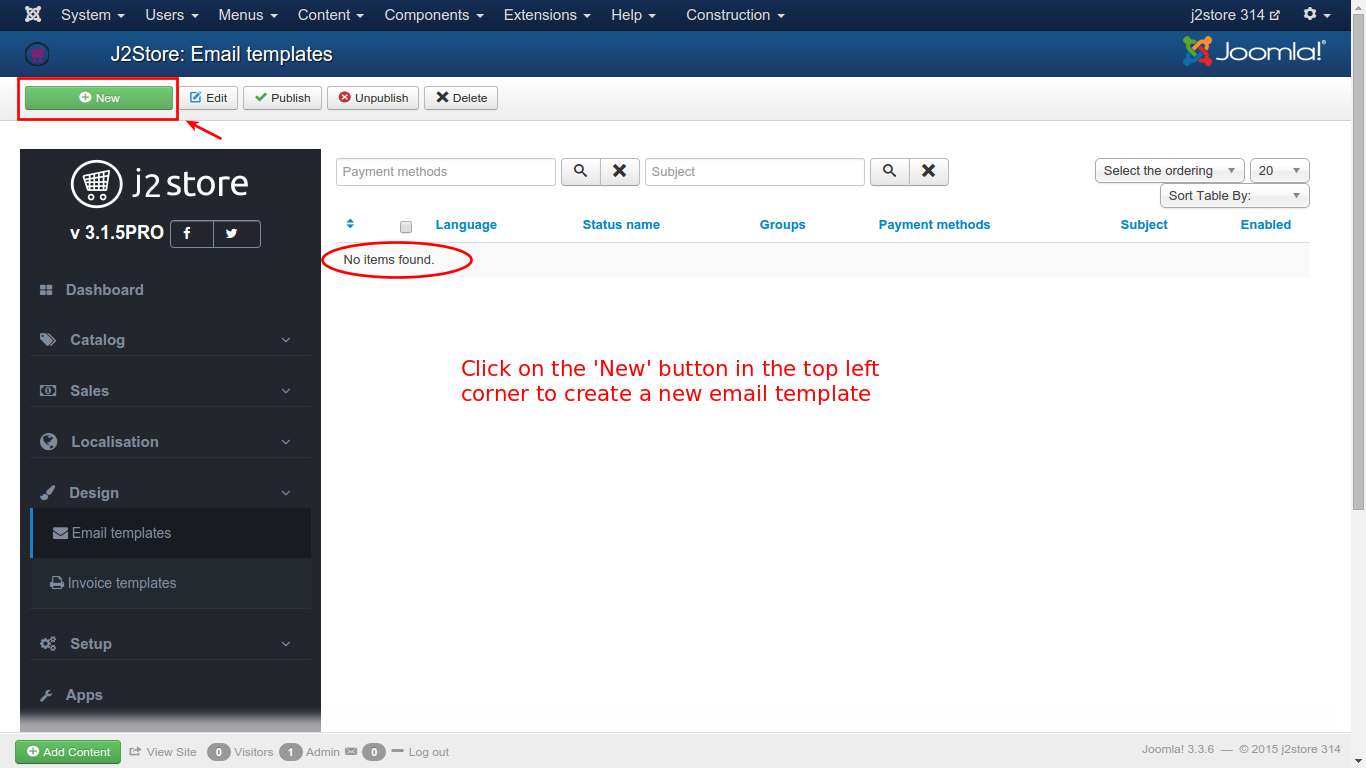
From the resulting page, click on New in the top left corner.
How to create email template?
You will get two settings tabs to be filled up for creating an email template. They are
Basic
Advanced
Basic
The fundamental requirements of a template. Let us see one by one.
Receiver
Choose the mail receiver to whom the mail should send. Sometimes you may want to send a mail to only customer or both admin and customer or to send store admin only. In this case, you can use this option to choose the mail receiver.
Language
The languages for which the template is compliant, is set here. You can select All for all languages.
Order Status
A specific order status can be selected for emailing the necessary intimation to be sent. It can be any one of all the options listed. If email has to be sent for multiple options, then multiple templates has to be created.
Groups
Here the user group from which the email can be sent is selected.
Payment Methods
The payment methods that are covered for emails can be selected here.
Enabled
It has to be enabled first to send email.
Subject
A short one line info about the content of the email.
Template Body Source
The source used to design the email template is selected here. There are two options to choose from. They are:
Simple Editor
Template List
After you select an option from the list, you have to Save once. Then only you can set the advanced tab.
In Simple Editor, the content of the email body can be designed here. There are so many options available to customize the content. There is a rich text editor that helps formatting the content. The facilities that are available in the editor:
Cut, Copy, Paste
Insert links or images
Formatting the text in the body like, bold, italicize, line spacing, underlining, and much more
Insert tables
Insert source code etc
Full articles can also be added to the content, from other external sources.
In Template List, you can have a list of templates in the form of .php files. You can select from the available one in the advanced tab.
Advanced
If you have selected Simple Editor in the Basic Tab, then the Advanced Tab will look like the below image.
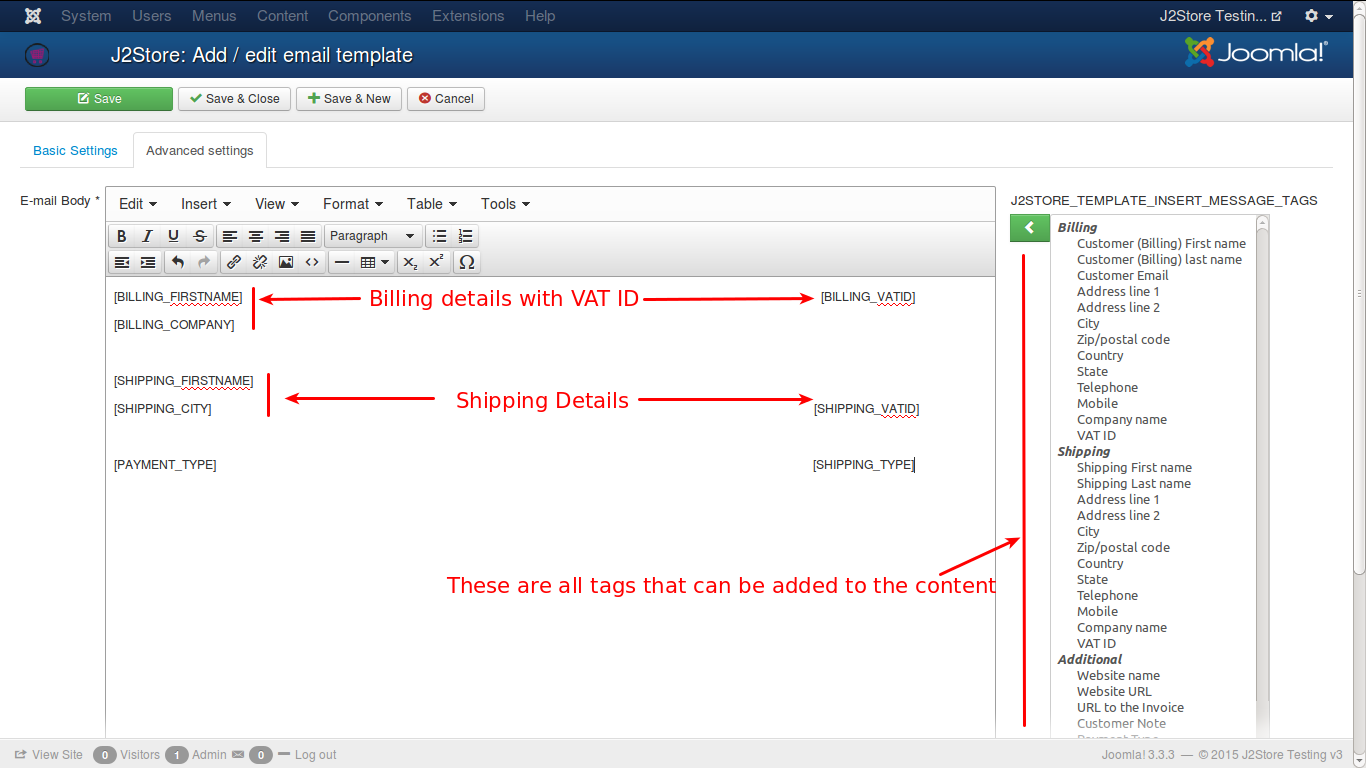
There are a number of tags listed in the extreme right of the editor from where they can be added to the editor content.
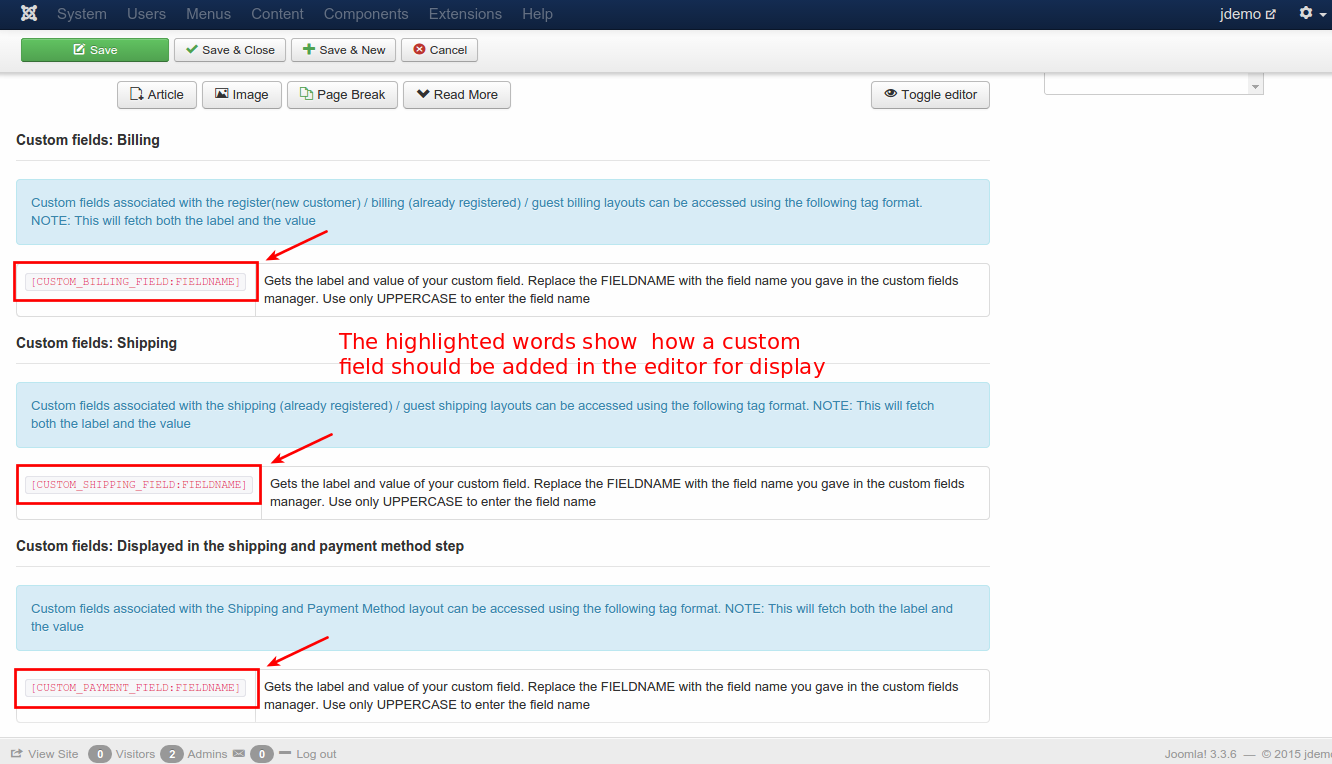
How to add custom fields inside email template ?
Also, you can add custom fields you have created in the editor. To add a custom field in the editor for display, you need to follow the format given below:
[CUSTOM_BILLING_FIELD:FIELDNAME]
Keep in mind, the following, when you add a custom field to the editor:
The custom field should be enclosed in []
All the letters should be in CAPITAL letters
‘CUSTOM’ is the first word inside the []
Next, the section in which you have created the field, like, ‘BILLING_FIELD’
And finally, the field name
Refer the image below for more clear understanding.
How to create template override for items table showing in the order email ?
If you would like to customize the order item table showing in order email notification, that could be possible by creating template override. Carrying out customizations through template override will not overwrite the changes if you update it in future.
Here are the instructions to be followed:
The files that controls items table is located at
/components/com_j2store/views/myprofile/tmpl/orderitems.php
Copy the above file and paste it under
/templates/YOUR-SITE-TEMPLATE/html/com_j2store/myprofile/orderitems.php
Edit
/templates/YOUR-SITE-TEMPLATE/html/com_j2store/myprofile/orderitems.php
Make your changes and save.
How to add logo in your Email Template ?
Short codes
Video tutorials
Last updated