
Custom fields
These are created for additional details to be used in checkout processes that involves billing, payment, shipping etc. For instance, ‘last name’ of a customer is not required for billing but it is required for shipment. So, it is created as a custom field and made to be displayed in shipping address.
There are two types of custom fields, namely, Core custom fields and Non-Core custom fields.
Custom fields that are in J2Store by default are Core custom fields and that are created by users are Non-Core custom fields.
Core custom fields can be edited as per users wish but it is not advisable to make changes to Core custom fields except changing the name and label of the fields.
The following is a list of Core custom fields:
first_name
last_name
address_1
address_2
phone_1
phone_2
city
zip
country
company
email
tax number
zone_id
country_id
Apart from these core custom fields, you can create your own custom fields according to your requirements.
For example, if you want to add a custom note for your reference, you can create it as a custom field and make it to be displayed in the billing or shipping process.
Check the image for a list of custom fields: 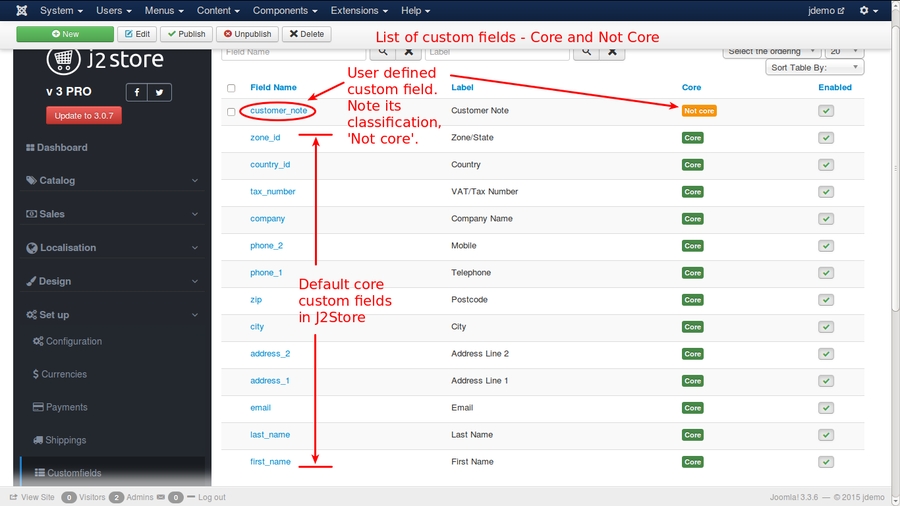
Let us see how to create a custom field.
In the custom field list view, click the New button. You will the get a screen as shown in the image below.
Add a Custom Field
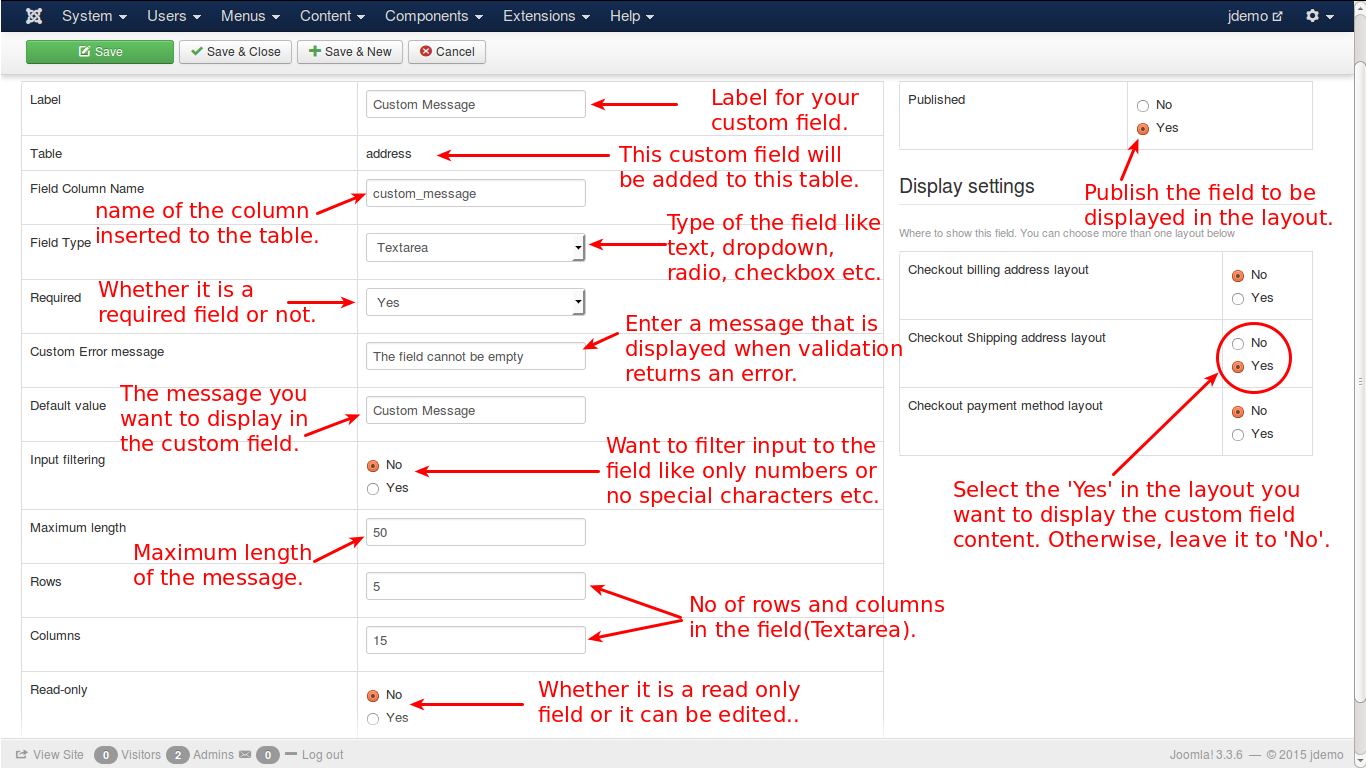
To add a custom field, we need to enter the following details. They are given below on by one:
Label - Name of the custom field that is displayed in the layout
Table - The table where the custom field is created - this is default and you can not change it
Field Column Name - name of the column that is created in the table
Field Type - This is the type of the field you are about to create and there are 12 types available to choose from - they are:TextEmailTextareawysiwyg editor (what you see is what you get)RadioCheckboxSingle DropdownZone/Country ListDateTimeDateTimeCustom Text
The remaining fields after the Field Type is selected, will be different based on the Field Type and the details have to fed as required by the changed fields
Required - Whether the field is required or not - select ‘Yes’ or ‘No’
Custom Error Message - If it is required field and left empty on data entry, this message will be displayed to alert the user
Default Value - What is given here will be the content displayed, if the user do not give any input to the field
Input Filtering - If you want to filter out the input to this field, you can select this to ‘Yes’ and set the conditions
Maximum Length - The no of characters that are allowed to enter in the field
Rows - No of rows that are allowed in the field
Columns - No of columns that are allowed in the field
Read-only - If it is set to ‘Yes’, it is only readable and the content cannot be changed
Status
Published - To display the field it has to be published by setting this option to ‘Yes’.
Display Settings
You can choose the layouts to display the field. You can select all the three layouts or any combination of layouts or only one layout. The layouts are:
Checkout Billing Address Layout
Checkout Shipping Address Layout
Checkout Payment Method Layout
Add the custom field in the checkout layout
To add the custom field into the checkout field,
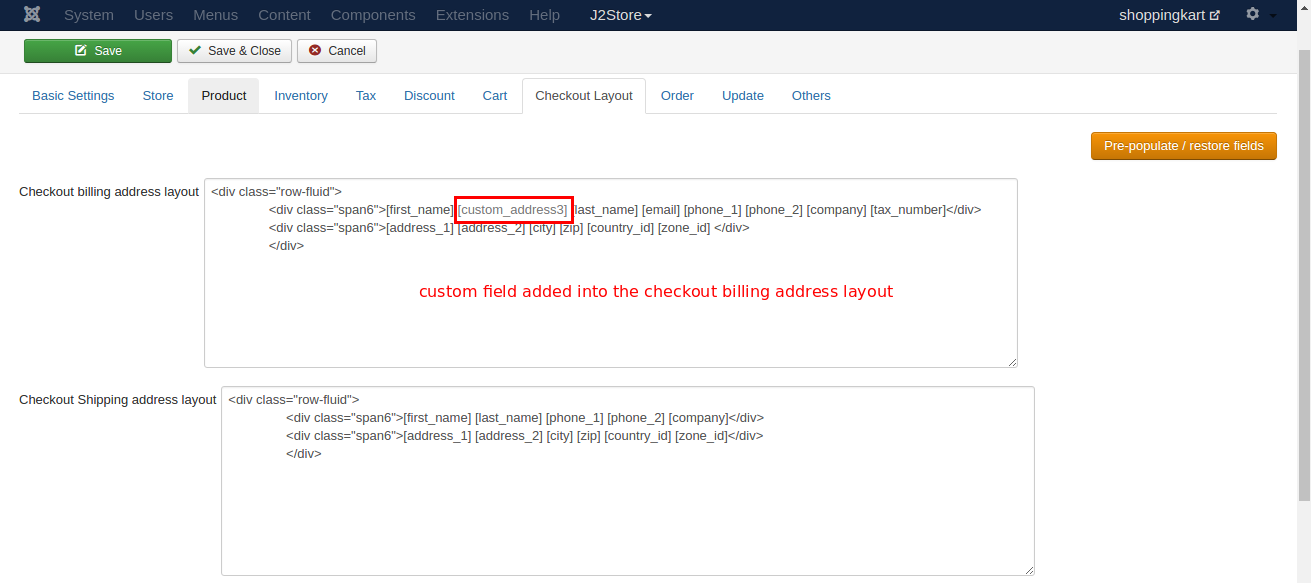
Go to J2store > setup > configuration > checkout layout
You can find the three layouts (billing address layout, shipping address layout, payment method layout).
Here you can edit the billing and shipping layouts by re-ordering the fields or by adding new fields(custom fields).
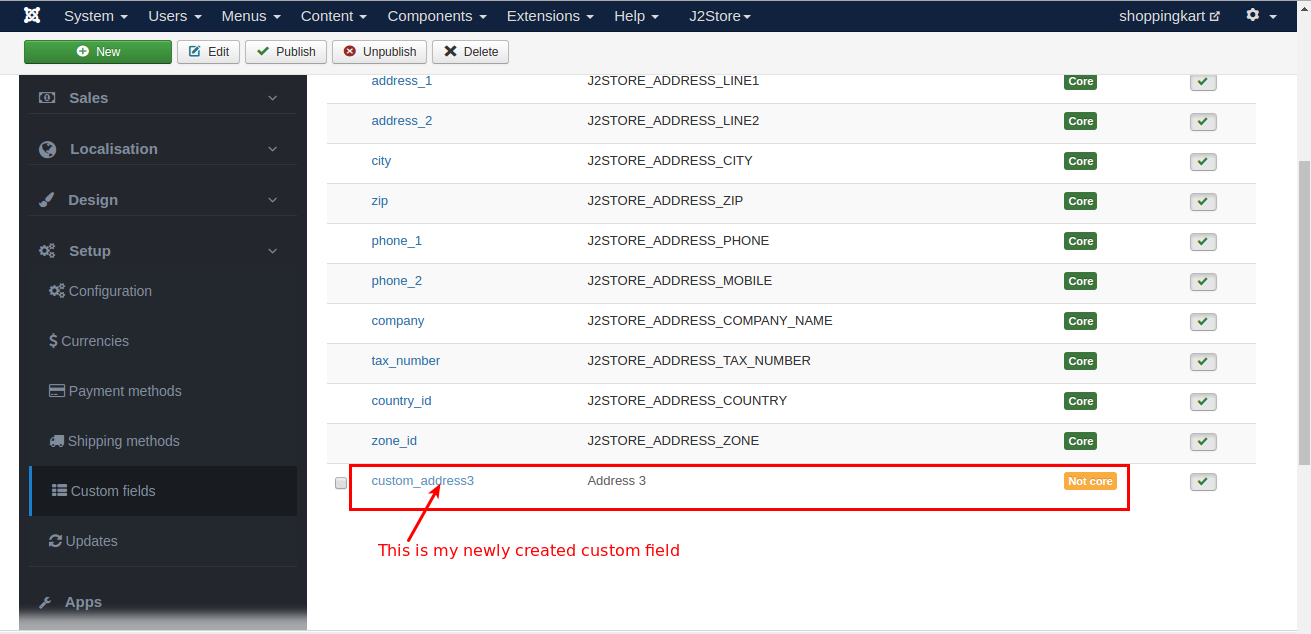
For example, if you have created the field called custom_address3 with the selection of billing address layout in custom field display settings and if you want to display it in the checkout layout, add it in the billing layout section in the J2store configuration checkout layout tab.
Field name should be enclosed with square brackets (for example,[custom_address3])
Refer the below pictures.
Adding custom fields to the checkout layout
Custom fields can be used to collect extra input from users. For example, if you wish to collect the desired delivery date from the users at the checkout page, this can be done by creating a date type custom field and adding it to the checkout layout as indicated below:
Adding the custom field at the J2Store->Setup->Configuration->Checkout layout page in the desired layout would display the custom field in that particular layout, thereby allowing users to choose their desired input.
And if you wish to send the chosen custom fields in the email notifications, this can be done by adding the shortcode of the custom field in the email template.
How to add custom fields inside email template ?
Also, you can add custom fields you have created in the editor. To add a custom field in the editor for display, you need to follow the format given below:
[CUSTOM_BILLING_FIELD:FIELDNAME]
Keep in mind, the following, when you add a custom field to the editor:
The custom field should be enclosed in []
All the letters should be in CAPITAL letters
‘CUSTOM’ is the first word inside the []
Next, the section in which you have created the field, like, ‘BILLING_FIELD’
And finally, the field name
Refer the image below for more clear understanding. 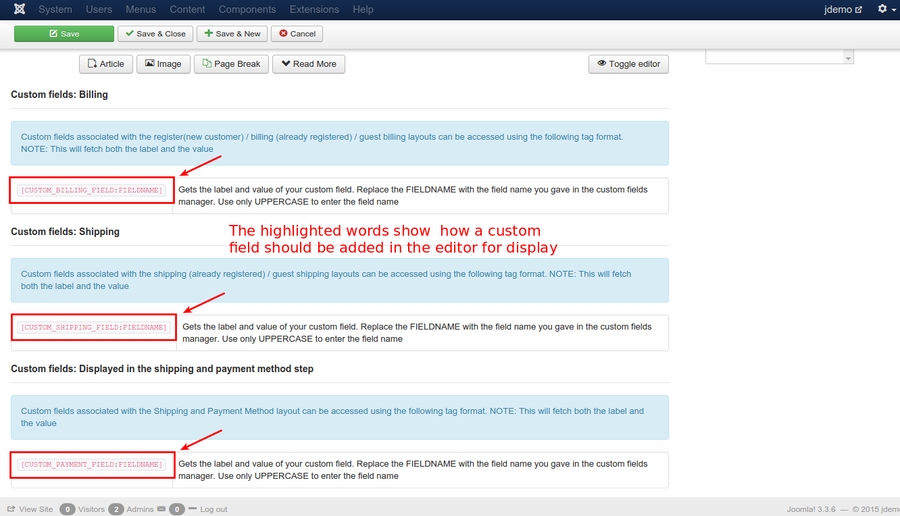
Last updated